Minisplit: 4. Testing and Refrigerant
I called several HVAC companies and told them I installed a minisplit system and need a pro to come over and to add the refrigerant and do the high pressure test and vacuum test. Both the charging and the testing requires specialized HVAC tools and expertise.
No contractors wanted to take on this work, because they don’t want to be stuck troubleshooting some shoddy install that a noob did from watching youtube videos. The equipment might have been damaged. There might be leaks, broken parts and they didn’t want to get blamed. That is totally reasonable.
I started studying for the EPA 608 certification so I can buy refrigerant on ebay and do the charging myself. During this time, I found a retired HVAC tech through a friend’s coworker’s friend that was willing to lend me his tools and come over and show me what needs to be done. He didn’t want to take any money, which I understood. He didn’t want to have any responsibility for my installation.
Heat Pump Theory
It helps to understand the basics of how a heat pump (i.e. condensor) works. The study guide for the EPA 608 certification is useful. Page 15 describes the refrigerant lifecycle as it turns from liquid to gas and back to liquid through the evaporator (i.e. inside wall unit) and the condensor (i.e. outside unit).

The key takeaway is that by changing the pressure of the refrigerant it turns into liquid and gas and can absorb or release heat as air is blown over the pipes containing the refrigerant.
r410a is used because this refrigerant changes easily between liquid and gas. Note: r410a is being phased out in 2023 and being replaced by more environmentally friendly (i.e. less ozone damaging) refrigerant, r32.
Because of the dangers to the environment, in order to purchase r410a, a certification must be obtained to demonstrate proper handling of the refrigerant so that it doesn’t get into the atmosphere. This requirement makes installing minisplit as a DIY project more challenging.
There are DIY friendly minisplit systems that come pre-charged with refrigerant so there is no need for a special license. They other reason they are DIY friendly is because they have warranty that are valid even if not installed by a professional. I did not buy a DIY system like Mr Cool or Pioneer, because I wanted the quality of a Daikin.
Charging Additional Refrigerant?
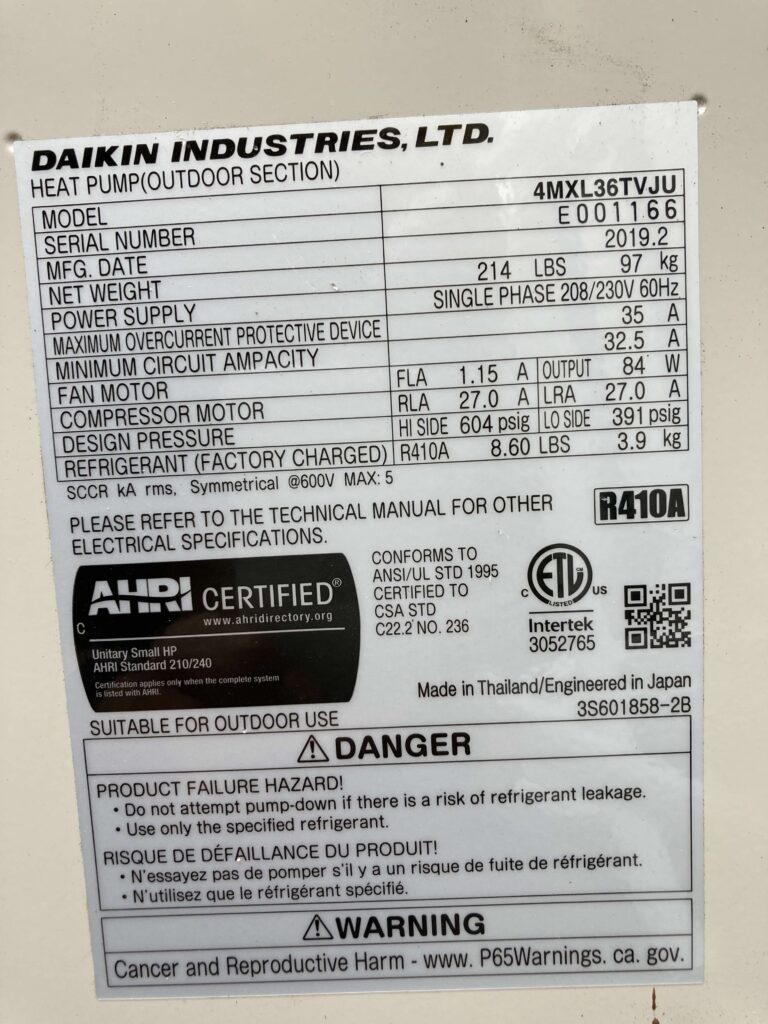
The Daikin condensor has refrigerant factory charged in the system, 8.6 pounds according to the label below which is good for a max 131 ft of lineset.

My system is around 140 ft. So I would need 9 ft. * 0.21oz = 2oz refrigerant to add to the system.

The HVAC pro said that the small amount (2oz) won’t affect the system performance. Also, it is unlikely I will have all 4 wall units on at the same time. During the day we will likely be in the living room and during the evenings the bedroom units will be one. Also, we only have three people in our family.
[Post install update: After three years, I have never had all four units running at the same time. Have had no performance issues.]
High Pressure Leak Test
October 9 2020, two months after receiving the shipment, almost a hundred hours of construction and connections, I am ready to test the system for leaks. At this point the linesets are all connected to the condensor. But no refrigerant has been released into the lines. To do the leak test we will add nitrogen into the system to create high pressure. Then we will monitor overnight to make sure the pressure holds. We will add a leak detector fluid on the joints to see if there is air escaping.
One of the many good DIY videos on youtube for high pressure minisplit test: https://www.youtube.com/watch?v=Ppw1QJjpxZQ
Some people say the high pressure test is optional because the vacuum test is sufficient to detect leaks and that the high pressure test is mainly used to determine where the leak is. I decided to do the high pressure test because: I had nitrogen available from the HVAC tech, the installation manual says to do it, and I feel that since the system runs at a high pressure, a high pressure test may detect issues that a vacuum test does not.
The service ports are pictured below. We will be doing all the tests using the service port on the left, the low pressure gas side. Note: I had to buy an adaptor to hook up the gauge to the service port: https://amzn.to/2LkzGwS Mini Split Gauge Adapter 1/4 to 5/16

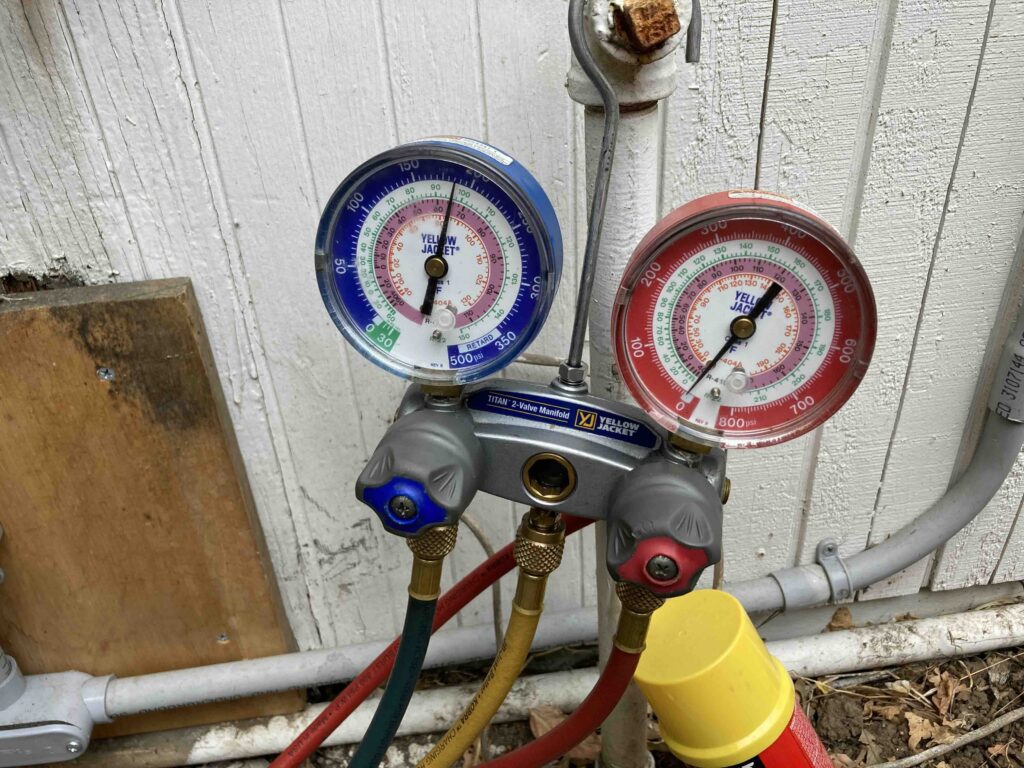
Setup: Yellow middle line from the gauge manifold (https://amzn.to/2LLKYxL) goes to the nitrogen tank. Blue line (low pressure) goes to the service port. Red line (high pressure) is closed off. Nitrogen is used instead of air because nitrogen has low moisture compared to air. Moisture in the mini split system will corrode the components and affect performance.

Running the test: Open up right valve on nitrogen tank all the way. Then release the left value on the nitrogen tank until the pressure on the left meter reads 200 psi. The manual said 550 psi, but I went with the advice of HVAC tech.

Then on the gauge manifold release the nitrogen into the system from the blue value. The blue meter should also read 550 psi. Monitor the pressure to make sure it holds at 550psi. I left it overnight.

With the pressurized nitrogen in the system we will run a bubble test by dapping on a soapy substance on the joints.

My 6 year old son helping with the applying the bubble test. If there is a leak at the joints, the nitrogen will leak out and create bubbles. Also apply the bubbles on the connections to the wall units.
Vacuum leak test
The final step before releasing the refrigerant is to vacuum out all the air in the system by hooking a vacuum pump to the service port. The air needs to be vacuumed out of the system before releasing the refrigerant because we don’t want moisture inside. We will leave the system in a vacuumed state overnight and measure that no air is getting the system.
Setup: The yellow line from the gauge hooks up to vacuum. The blue line hooks up to the service port. Unfortunately I don’t have a picture of how the the vacuum meter (round yellow device) is hooked up to the service port. It is connected to a valve between the blue line and the service port.

Running the test: Run vacuum to bring the system bring down to 500 microns. It takes about 30 minutes for the system to be evacuated of air. Turn off the vacuum and leave overnight. Monitor the vacuum meter for no change.

Another type of vaccum gauge, this one is more precise because it gives an distinct micron level rather than just a range.

The pressure will fluctuate slightly throughout the night because the temperature change. That is ok, just make sure it eventually stabilizes and doesn’t continually rise. A perfect vacuum will show a reading of 0. At sea level there are 760,000 microns of atmospheric pressure.
If you have leaks you will need to find where the leak is using the bubbles and high pressure and possible redo the connections. For my installation, the high pressure test and vacuum leak test showed no leaks., so I am ready to release the refrigerant into the lines.
Release refrigerant
Leave the vacuum pump and manifold gauge lines on until after release because vacuum will cause a bit of air to be sucked in when disconnecting valves. Use hex wrench on left service port, the gas line. Turn the valve all the way out and hear the refrigerant flow. After the flow is done, back off the valve a quarter turn. Repeat on the liquid line.
[picture with arrow to gas and liquid line]
After the release is complete, disconnect the vacuum pump. The shrader valve will prevent the gas in the system from leaking out when you disconnect the line from the service port. You may hear some gas hissing out when you first disconnect. That is the gas in the hose coming out and will stop shortly.
Turning on the system
It is now October 28. The original plan was to complete the system in time to use for the summer heat wave. That didn’t happen. Instead of testing the cooling we are testing the heating.
It works. There is heat. We are part of civilization again. Basic physiological needs, the first level of Maslow’s Hierarchy of Needs (see below), has been restored to our daily life.

I am thankful to the HVAC tech who guided me. Thankful to the countless DIY youtubers sharing their knowledge and experiences. Especially grateful to my wife who tolerated this ambitious DIY project through the summer heat wave of 2020. I can now focus my energies fulfilling her psychological needs.